Setting Up Postman with the API Server | Full-Stack Google Contacts Clone with AdonisJS (Node.js) and Quasar Framework (Vue.js)
In this lesson, we will setup Postman and integrate it with our API server. We will ping the / and /health routes with Postman and learn a little about how to work Postman. As we advance in this tutorial, you will learn more about Postman practically. If you have not installed Postman yet, download it from their website and install.
Why Postman? Postman is an API platform used for testing, documenting, and mocking API requests. If you are building a backend for an application, you do not need to use the frontend (or wait for the frontend to be ready) to test your endpoints. Postman provides all the tools needed to test and mock your API endpoints (routes) and create detailed documentations (including examples) for each endpoint. This allows you to create the API endpoints of your application independent of the development process of the frontend.
Now, let's setup Postman. Launch Postman. If you are asked to create an account, follow through and have your account ready.
Create a new Workspace
- On the top menu, click
Workspaces > New Workspace. - In the
Create New Workspaceform:- For
Namefield, enter:Google Contacts Clone. - For
Visibility, selectPersonal
- For
- Click
Create Workspaceat the bottom - The new workspace will be created and opened.
Create a Collection
A collection is used to group related API endpoints. We need one to hold our two routes: / and /health. We will call it API Entry collection.
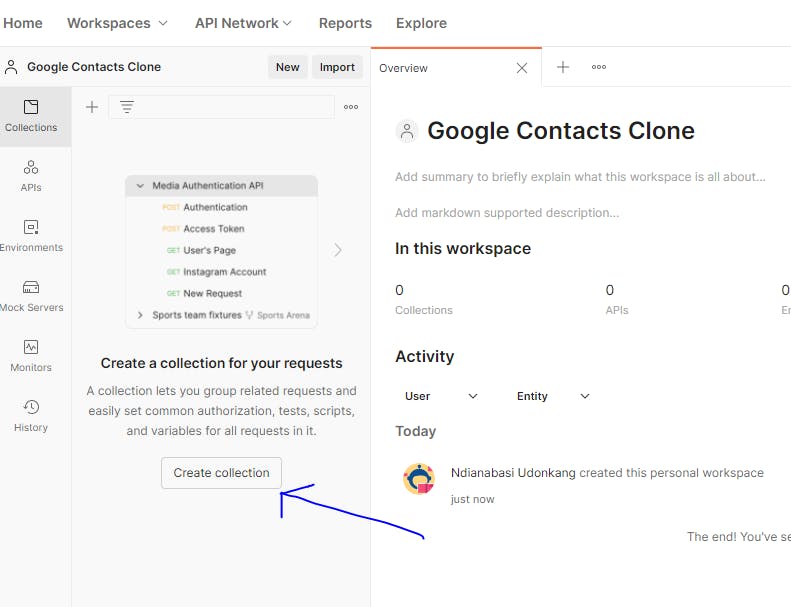
- On the left side of the window, click
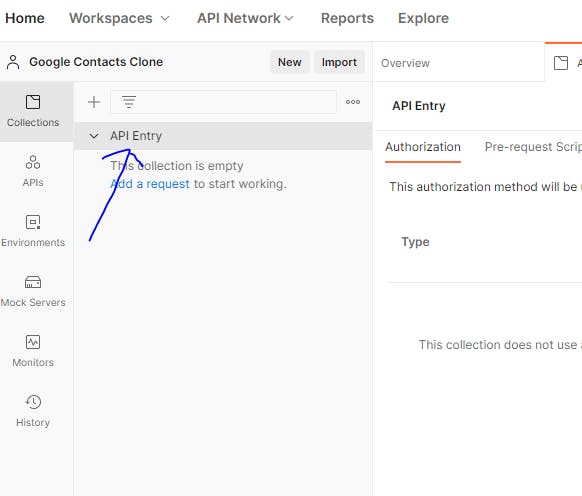
Create Collection. - Enter the name:
API Entry. This creates theAPI Entrycollection. You can see it now on the left side within theCollectionstab.
Create a New Environment
Before we continue any further, we need to create an environment which will hold important variables for our workspace. Variables are used to hold values which will be reused throughout our workspace.
On the left hand side of the
Google Contacts Cloneoverview window, clickCreate an environment.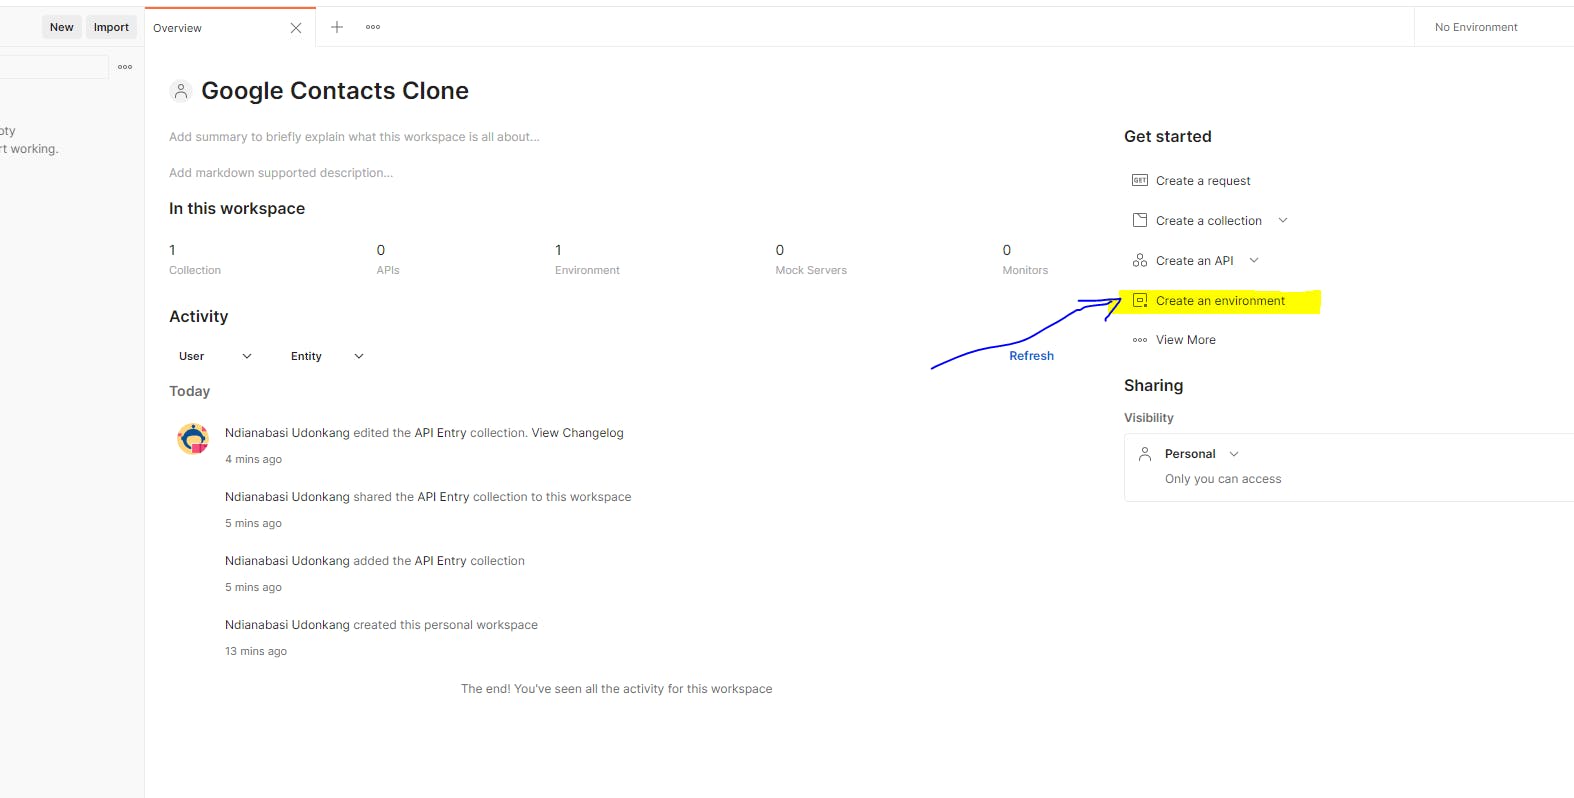
Enter
Defaultin theEnvironment namefield.- Within the environment table,
- Enter
baseURLunderVARIABLEcolumn, - Enter
http://127.0.0.1:3333underINITIAL VALUEcolumn. No need to fill theCURRENT VALUEcolumn. It will be populated with the initial value, if not set.
- Enter
Click the more (
...) button at the top right of the environment table (see image below). Then clickSet an active environment.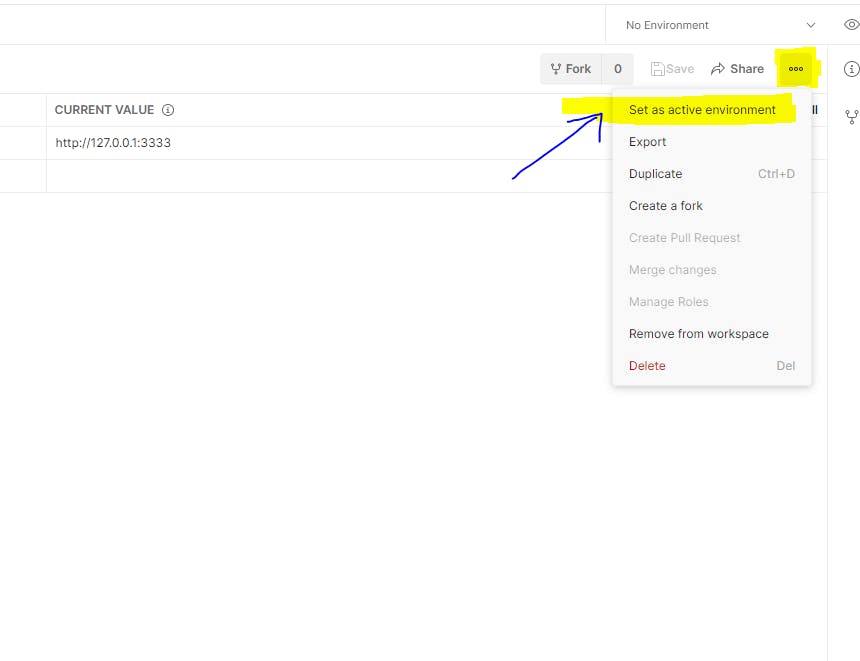
Create a New Request for the / endpoint
Make sure that your API server is running.
# In the route of your project
cd api
yarn serve # <-- Run the server
Within the
Collectionstab, underAPI Entrycollection, clickAdd a requestto create a new request.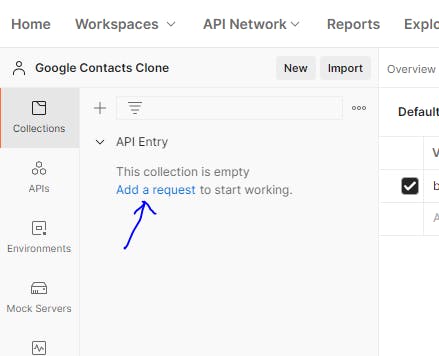
In the
Request namefield, enter:Home- We will use the
GETmethod. - In the
request URLfield, enter:{{baseURL}}/. Here we are interpolating (inserting/consuming) thebaseURLvariable we created in ourDefaultenvironment. - Click the
Savebutton at the top right. - Click the
Sendbutton to send the API request. - You should get a response at the bottom of the bottom. As shown below:
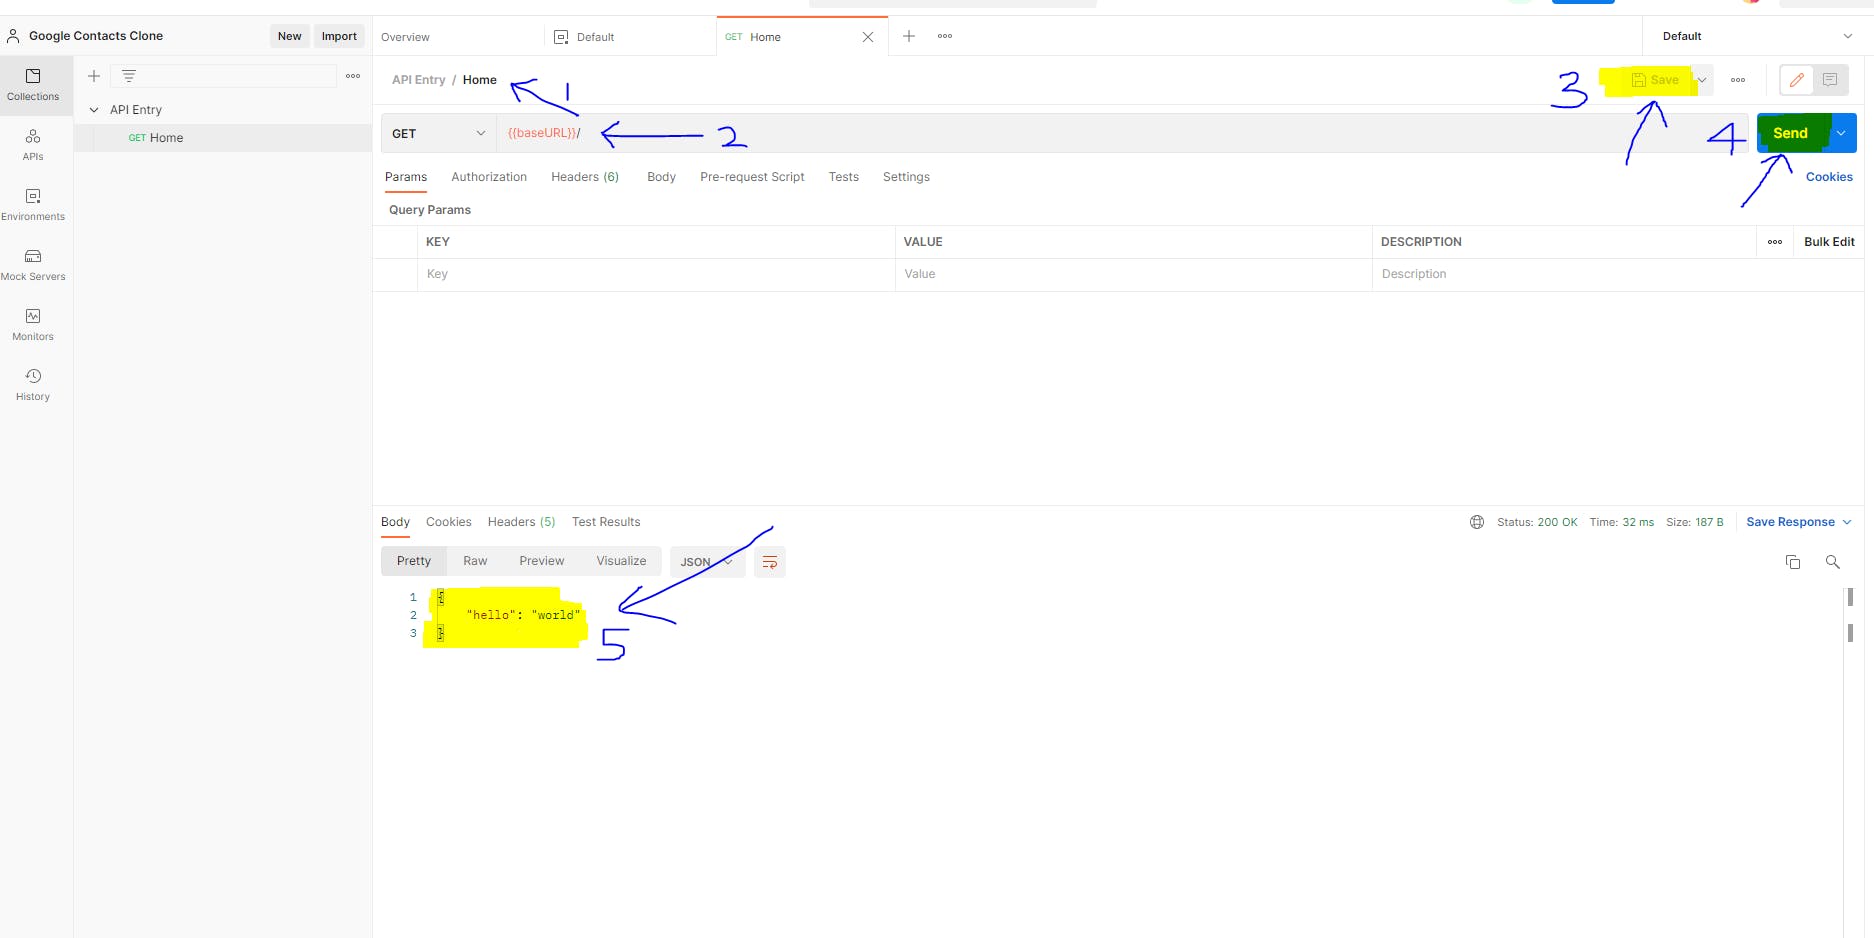
If everything went well, congratulations. You've made your first API request with Postman.
Creating a New Request for the /health endpoint
- Within the
Collectionstab, right click theAPI Entrycollection name, clickAdd Requestto create a new request. - In the
Request nameenter:Health Check - We will use the
GETmethod. - In the
request URLfield, enter:{{baseURL}}/health. - Click the
Savebutton at the top right. - Click the
Sendbutton to send the API request. - You should get a response at the bottom of the bottom. As shown below:
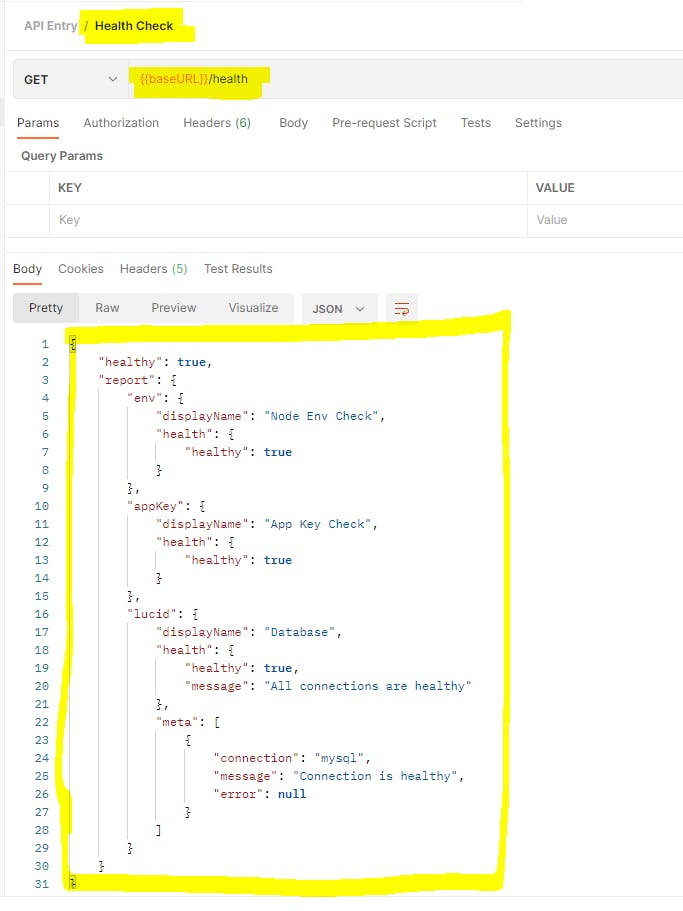
If everything went well, congratulations!!! You are on your way to being an awesome backend developer.
In the next lesson, we will look at start creating the models and controllers for our contacts.

